Translation and Rotation
Images can be shifted (shift()), rotated (rotate()) using different
types of interpolation. The interpolation method is specified by the order
parameter which may take the following values:
|
Method |
|---|---|
0 |
Nearest Neighbor |
1 |
Linear (default) |
2 |
Quadratic |
3 |
Cubic |
4 |
Quartic |
5 |
Quintic |
NaN Handling
NaNs will be automatically accounted for in images. This is easy to accomplish
using nearest-neighbor interpolation, but can get slightly complicated for
order >= 1.
If NaNs are detected in the image, they must first replaced by a real float
value. This replacement value is determined by the nan_interpolation
parameter. If nan_interpolation = None, then NaN values will be replaced by
an interpolated value using the Clough-Tocher scheme (see
image_naninterp() and clough_tocher_2dfunc()). Otherwise, the user
may set nan_interpolation to any real float value. The default value is
zero.
Following a shift or rotate, NaN values (or another float value set by the
missing parameter) are put back into the image at the new interpolated
location. As a NaN may have been interpolated onto a fractional pixel
position (for example, 75% in one pixel, 25% in others), the missing_limit
parameter is used to determine whether a pixel should be replaced by the
missing value. For example, using the default value of missing_limit=0.5,
if a NaN value occupies 50% or more of a pixel in the new interpolated
position, it will be replaced by missing (default=NaN).
Note that the previous value determined by nan_interpolation may be kept by
setting missing=None. However, any interpolated value that originated from
outside the bounds of the original image will be set to NaN in the output image
in this case.
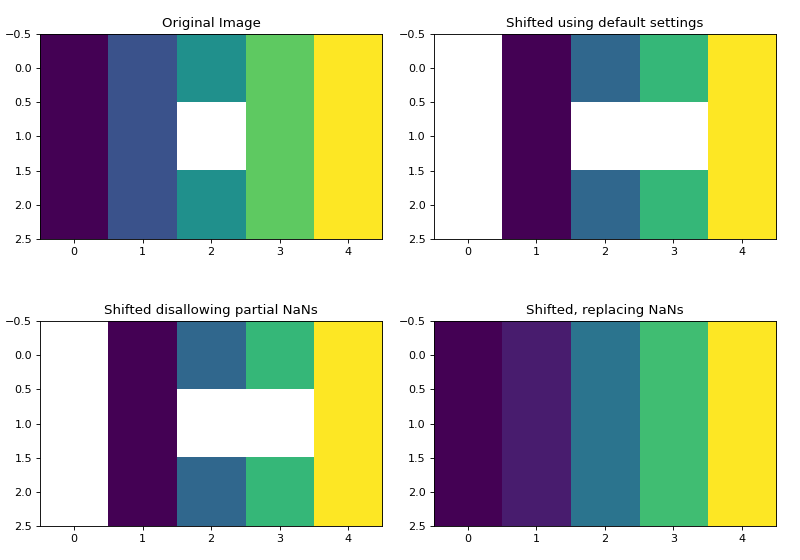
The following plots show an image containing a NaN shifted by 0.75 pixels in the x-direction.
>>> import matplotlib.pyplot as plt
>>> import numpy as np
>>> from sofia_redux.toolkit.image.adjust import shift
>>> image = np.repeat(np.arange(5, dtype=float)[None], 3, axis=0)
>>> image[1, 2] = np.nan
>>> # shift the image by 0.75 pixels in the x-direction
>>> offset = [0, 0.75]
>>> default = shift(image, offset, nan_interpolation=None)
>>> no_fractional_nans = shift(image, offset, missing_limit=0,
...                            nan_interpolation=None)
>>> replace_nans = shift(image, offset, missing=None, mode='nearest',
...                      nan_interpolation=None)
>>> # print a cross section of the new interpolated values
>>> print("Shifted values: %s->%s" % (image[0], replace_nans[0]))
Shifted values: [0. 1. 2. 3. 4.]->[0.   0.25 1.25 2.25 3.25]
Plotted below are the distribution of NaNs in the shifted image depending
on the settings. Note that mode='nearest' was used such that NaNs are
not inserted at x=0 due to boundary conditions. The NaN boundary effect
can be seen on the two other shifted plots.
(Source code, png, hires.png, pdf)

Example of Shifting and Rotating
import numpy as np
import matplotlib.pyplot as plt
import imageio
from sofia_redux.toolkit.image.adjust import shift, rotate

image = imageio.imread('imageio:camera.png').astype(float)
image /= image.max()

# pad so we don't cut off information during rotation
image = np.pad(image, 100, mode='constant', constant_values=np.nan)

# insert some NaN values (off with his head)
image[170:260, 300:370] = np.nan

# rotate then shift the image
pivot = [600, 100]  # rotate around this pixel

# rotate by 10 degrees around `pivot`
# set `missing_limit` to zero to skip NaN replacement by interpolation,
# and simply disallow any pixels containing part of an original NaN
# pixel.
image_rotated = rotate(image, 10.0, missing_limit=0, pivot=pivot)

# shift by 100 pixels in x and 145.5 pixels in y
image_shifted = shift(image_rotated, [145.5, 100], missing_limit=0)

plt.figure(figsize=(10, 4))
plt.subplot(131)
plt.imshow(image, cmap='gray')
plt.title("Original Padded Image")

plt.subplot(132)
plt.imshow(image_rotated, cmap='gray')
plt.title("Rotated Image")

plt.subplot(133)
plt.imshow(image_shifted, cmap='gray')
plt.title("Rotated and Shifted Image")
(Source code, png, hires.png, pdf)
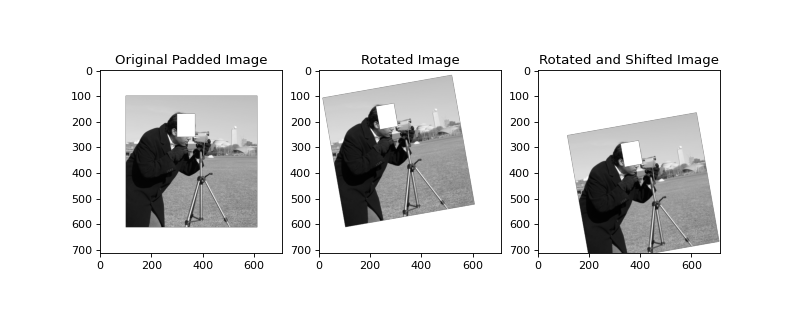
In the above example, the right-most image has been transformed by a rotation
(rotate()) followed by a translation (shift()). The NaN rectangle
has been inserted to demonstrate effective NaN handling using missing_limit=0
to completely disallow any interpolation of NaNs.
Resizing Images
Images may be resized to a new size using frebin() and the
same interpolation methods already described for shift() and
rotate(). NaN handling is also achieved in the same manner. However,
if the order parameter is set to None (default), nearest neighbor
interpolation will be used if the input array shape is an exact integer
multiple of the output array shape, i.e., shrinking the array by an integer
factor. Otherwise, linear interpolation will be used.
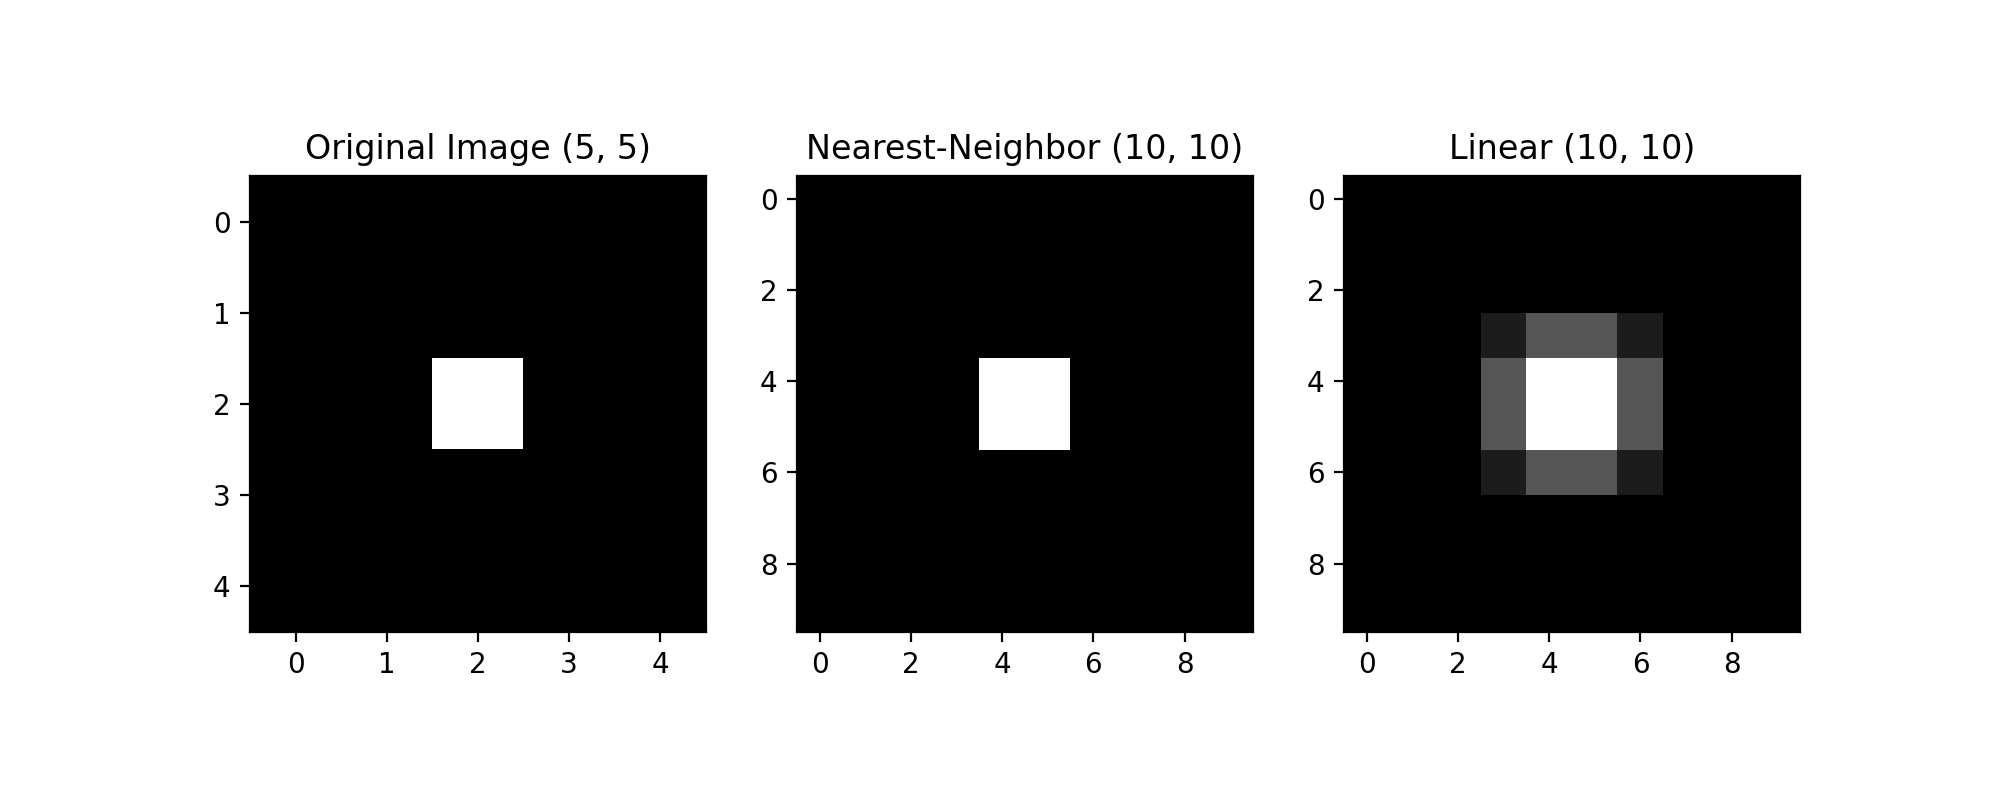
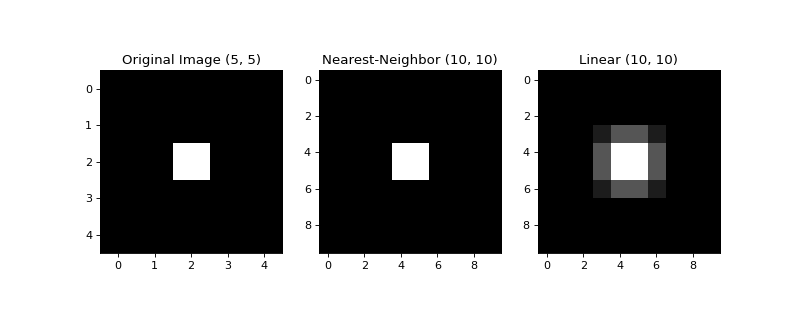
The example below re-resizes a (5 x 5) image to (10 x 10) using both nearest-neighbor and linear interpolation.
import numpy as np
import matplotlib.pyplot as plt
from sofia_redux.toolkit.image.adjust import frebin

image = np.zeros((5, 5))
image[2, 2] = 1

shape = [x * 2 for x in image.shape]

resized0 = frebin(image, shape, order=0)
resized1 = frebin(image, shape, order=1)

plt.figure(figsize=(10, 4))
plt.subplot(131)
plt.imshow(image, cmap='gray')
plt.title("Original Image %s" % repr(image.shape))

plt.subplot(132)
plt.imshow(resized0, cmap='gray')
plt.title("Nearest-Neighbor %s" % repr(resized0.shape))

plt.subplot(133)
plt.imshow(resized1, cmap='gray')
plt.title("Linear %s" % repr(resized1.shape))
(Source code, png, hires.png, pdf)
90 Degree Array Rotations
A functionally equivalent implementation of the IDL
rotate function
(rotate90()) can be used to rotate a 2 dimensional array by multiples
of 90 degrees and optionally apply a transpose operation. The
unrotate90() is also available to perform the reverse operation.
The type of transform is governed by an integer (direction) ranging from 0
to 7, whose effect is shown in the table below.
Direction
Transpose?
AntiClockwise
X1
Y1
0
N
0
X0
Y0
1
N
90
-Y0
X0
2
N
180
-X0
-Y0
3
N
270
Y0
-X0
4
Y
0
Y0
X0
5
Y
90
-X0
Y0
6
Y
180
-Y0
-X0
7
Y
270
X0
-Y0
The following examples show how rotate operates:
from sofia_redux.toolkit.image.adjust import rotate90, unrotate90
import numpy as np
x = np.arange(16).reshape(4, 4) + 1
xr1 = rotate90(x, 1)  # Rotate 90 degrees anti-clockwise
print("Original:\n%s\n" % x)
print("Rotated 90 degrees:\n%s\n" % xr1)
print("Transposed and rotated 90 degrees:\n%s" % xr5)
Output:
Original:
[[ 1  2  3  4]
 [ 5  6  7  8]
 [ 9 10 11 12]
 [13 14 15 16]]

Rotated 90 degrees:
[[13  9  5  1]
 [14 10  6  2]
 [15 11  7  3]
 [16 12  8  4]]

Transposed and rotated 90 degrees:
[[ 4  3  2  1]
 [ 8  7  6  5]
 [12 11 10  9]
 [16 15 14 13]]
Note, if a 1-dimensional array is rotated 90 degrees in either direction, it is transformed to a 2-dimensional array to reproduce IDL results. However, a 2-dimensional (1, N) array will not be converted back to a 1 dimensional array following the reverse operation:
x = np.arange(4) + 1
xr1 = rotate90(x, 1)
xu1 = unrotate90(x, 1)
print("Original %s:\n%s\n" % (repr(x.shape), x))
print("Rotated 90 degrees %s:\n%s\n" % (repr(xr1.shape), xr1))
print("Previous result unrotated %s:\n%s" % (repr(xu1.shape), xu1))
Output:
Original (4,):
[1 2 3 4]

Rotated 90 degrees (1, 4):
[[4 3 2 1]]

Previous result unrotated (1, 4):
[[1 2 3 4]]
Image Registration
The relative pixel offset between two images can be found using
register_image(). Phase cross-correlation using Fourier transforms is
used to determine these offsets. The user may opt to supply an initial guess
(shift0) of the offset in cases where the offset is large with repeating
structures in the image. By default, the calculated offsets are accurate to
1 pixel. This may be increased using the upsample keyword which expands the
size of the image in the frequency domain. Therefore, using upsample will
increase the processing time.
The following example registers the pixel shift between two images to an accuracy of 0.1 pixels by upsampling by a factor of 10:
import matplotlib.pyplot as plt
import numpy as np
import imageio
from sofia_redux.toolkit.image.adjust import register_image, shift

image = np.pad(imageio.imread('imageio:coins.png').astype(float), 10)
image -= np.median(image)

offsets = [12.3, 45.6]
offset_image = shift(image, offsets, missing=0, order=3)
estimated_shift = register_image(image, offset_image, upsample=10)
print(estimated_shift)
Output:
[45.6 12.3]
Nate that the offset returned by register_image() is given in the (x, y)
order, while shift() uses axis order (y, x). Please consider this
ordering discrepancy if using shift() to correct a pixel offset
calculated using the above method.